> ## Documentation Index
> Fetch the complete documentation index at: https://docs-dev-docs-event-stream-action-templates.mintlify.site/llms.txt
> Use this file to discover all available pages before exploring further.
> How to install and get started with Auth0.swift
# Auth0.swift
Swift SDK for iOS, macOS, tvOS, and watchOS that enables you to seamlessly integrate Auth0 into your apps. Add login and logout, store credentials securely, and access user information.
**See the** [**GitHub repository**](https://github.com/auth0/Auth0.swift)
**Migrating from v1? Check the** [**Migration Guide**](https://github.com/auth0/Auth0.swift/blob/master/V2_MIGRATION_GUIDE.md)
## Documentation
* [Quickstart](/docs/quickstart/native/ios-swift/interactive): Shows how to integrate Auth0.swift into an iOS / macOS app from scratch.
* [Sample App](https://github.com/auth0-samples/auth0-ios-swift-sample/tree/master/Sample-01): A complete, running iOS / macOS app you can try.
* [Examples](https://github.com/auth0/Auth0.swift/blob/master/EXAMPLES.md): Explains how to use most features.
* [API Documentation](https://auth0.github.io/Auth0.swift/documentation/auth0): Documentation auto-generated from the code comments that explains all the available features.
* [Web Auth](https://auth0.github.io/Auth0.swift/documentation/auth0/webauth)
* [Credentials Manager](https://auth0.github.io/Auth0.swift/documentation/auth0/credentialsmanager)
* [Authentication API Client](https://auth0.github.io/Auth0.swift/documentation/auth0/authentication)
* [Management API Client (Users)](https://auth0.github.io/Auth0.swift/documentation/auth0/users)
* [FAQ](https://github.com/auth0/Auth0.swift/blob/master/FAQ.md): Answers some common questions about Auth0.swift.
* [Auth0 Documentation:](https://auth0.com/docs) Explore our docs site and learn more about Auth0.
## Getting started
### Requirements
* iOS 13.0+ / macOS 11.0+ / tvOS 13.0+ / watchOS 7.0+
* Xcode 14.x
* Swift 5.7+
Check the [Support Policy](https://github.com/auth0/Auth0.swift/tree/master#support-policy) to learn when dropping Xcode, Swift, and platform versions will not be considered a **breaking change**.
### Installation
#### Swift Package Manager
Open the following menu item in Xcode:
**File > Add Packages...**
In the **Search or Enter Package URL** search box enter this URL:
```http lines theme={null}
https://github.com/auth0/Auth0.swift
```
Then, select the dependency rule and press **Add Package**.
#### Cocoapods
Add the following line to your `Podfile`:
```bash lines theme={null}
pod 'Auth0', '~> 2.0'
```
Then, run `pod install`.
#### Carthage
Add the following line to your `Cartfile`:
```bash lines theme={null}
github "auth0/Auth0.swift" ~> 2.0
```
Then, run `carthage bootstrap --use-xcframeworks`.
### Configure the SDK
Go to the [Auth0 Dashboard](https://manage.auth0.com/#/applications/) and create a new **Native** application.
Auth0.swift needs the **Client ID** and **Domain** of the Auth0 application to communicate with Auth0. You can find these details in the Settings page of your Auth0 application. If you are using a [custom domain](/docs/customize/custom-domains), use the value of your custom domain instead of the value from the Settings page.
#### Configure Client ID and Domain with a plist
Create a `plist` file named `Auth0.plist` in your app bundle with the following content:
```xml lines theme={null}
ClientId
{yourAuth0ClientId}
Domain
{yourAuth0Domain}
```
#### Configure Client ID and Domain programmatically
##### For Web Auth
```swift lines theme={null}
Auth0
.webAuth(clientId: "{yourAuth0ClientID}", domain: "{yourAuth0Domain}")
// ...
```
##### For the Authentication API client
```swift lines theme={null}
Auth0
.authentication(clientId: "{yourAuth0ClientID}", domain: "{yourAuth0Domain}")
// ...
```
##### For the Management API client (Users)
```swift lines theme={null}
Auth0
.users(token: credentials.accessToken, domain: "{yourAuth0Domain}")
// ...
```
### Configure Web Auth (iOS / macOS)
#### Configure callback URL and logout URL
The callback URL and logout URL are the URLs that Auth0 invokes to redirect back to your application. Auth0 invokes the callback URL after authenticating the user, and the logout URL after removing the session cookie.
Since the callback URL and logout URL can be manipulated, you will need to add your URLs to the **Allowed Callback URLs** and **Allowed Logout URLs** fields in the Settings page of your Auth0 application. This will enable Auth0 to recognize these URLs as valid. If the callback URL and logout URL are not set, users will be unable to log in and out of the application and will get an error.
Go to the Settings page of your [Auth0 application](https://manage.auth0.com/#/applications/) and add the corresponding URL to **Allowed Callback URLs** and **Allowed Logout URLs**, according to the platform of your application. If you are using a [custom domain](/docs/customize/custom-domains), replace `{yourAuth0Domain}` with the value of your custom domain instead of the value from the Settings page.
##### iOS
```swift wrap lines theme={null}
{yourBundleIdentifier}://{yourAuth0Domain}/ios/{yourBundleIdentifier}/callback
```
##### macOS
```swift wrap lines theme={null}
{yourBundleIdentifier}://{yourAuth0Domain}/macos/{yourBundleIdentifier}/callback
```
For example, if your iOS bundle identifier was `com.example.MyApp` and your Auth0 Domain was `example.us.auth0.com`, then this value would be:
```text wrap lines theme={null}
com.example.MyApp://example.us.auth0.com/ios/com.example.MyApp/callback
```
Make sure that the [**Token Endpoint Authentication Method**](/docs/get-started/applications/confidential-and-public-applications/view-application-type) setting is set to `None`.
#### Configure custom URL scheme
In Xcode, go to the **Info** tab of your app target settings. In the **URL Types** section, click the **+** button to add a new entry. There, enter `auth0` into the **Identifier** field and `$(PRODUCT_BUNDLE_IDENTIFIER)` into the **URL Schemes** field.
This registers your bundle identifier as a custom URL scheme, so the callback URL and logout URL can reach your app.
### Web Auth login (iOS / macOS)
Import the `Auth0` module in the file where you want to present the login page.
```swift lines theme={null}
import Auth0
```
Then, present the [Universal Login](/docs/authenticate/login/auth0-universal-login) page in the action of your **Login** button.
```swift lines theme={null}
Auth0
.webAuth()
.start { result in
switch result {
case .success(let credentials):
print("Obtained credentials: \(credentials)")
case .failure(let error):
print("Failed with: \(error)")
}
}
```
#### Using async/await
```swift lines theme={null}
do {
let credentials = try await Auth0.webAuth().start()
print("Obtained credentials: \(credentials)")
} catch {
print("Failed with: \(error)")
}
```
#### Using Combine
```swift lines theme={null}
Auth0
.webAuth()
.start()
.sink(receiveCompletion: { completion in
if case .failure(let error) = completion {
print("Failed with: \(error)")
}
}, receiveValue: { credentials in
print("Obtained credentials: \(credentials)")
})
.store(in: &cancellables)
```
### Web Auth logout (iOS / macOS)
Logging the user out involves clearing the Universal Login session cookie and then deleting the user's credentials from your application.
Call the `clearSession()` method in the action of your **Logout** button. Once the session cookie has been cleared, [delete the user's credentials](https://github.com/auth0/Auth0.swift/blob/master/EXAMPLES.md#clear-stored-credentials).
```swift lines theme={null}
Auth0
.webAuth()
.clearSession { result in
switch result {
case .success:
print("Session cookie cleared")
// Delete credentials
case .failure(let error):
print("Failed with: \(error)")
}
}
```
#### Using async/await
```swift lines theme={null}
do {
try await Auth0.webAuth().clearSession()
print("Session cookie cleared")
// Delete credentials
} catch {
print("Failed with: \(error)")
}
```
#### Using Combine
```swift lines theme={null}
Auth0
.webAuth()
.clearSession()
.sink(receiveCompletion: { completion in
switch completion {
case .finished:
print("Session cookie cleared")
// Delete credentials
case .failure(let error):
print("Failed with: \(error)")
}
}, receiveValue: {})
.store(in: &cancellables)
```
### SSO alert box (iOS / macOS)
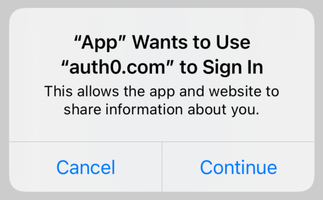 Check the [FAQ](https://github.com/auth0/Auth0.swift/blob/master/FAQ.md) for more information about the alert box that pops up by default when using Web Auth.
See also [How to Create a Seamless Mobile SSO (Single Sign-On) Experience in iOS](https://developer.okta.com/blog/2022/01/13/mobile-sso) for a detailed overview.
## Next steps
Learn about most features in [Examples](https://github.com/auth0/Auth0.swift/blob/master/EXAMPLES.md):
* [Store credentials](https://github.com/auth0/Auth0.swift/blob/master/EXAMPLES.md#store-credentials): Store the user's credentials securely in the Keychain.
* [Check for stored credentials](https://github.com/auth0/Auth0.swift/blob/master/EXAMPLES.md#check-for-stored-credentials): Check if the user is already logged in when your app starts up.
* [Retrieve stored credentials](https://github.com/auth0/Auth0.swift/blob/master/EXAMPLES.md#retrieve-stored-credentials): Get the user's credentials from the Keychain, automatically renewing them if they have expired.
* [Clear stored credentials](https://github.com/auth0/Auth0.swift/blob/master/EXAMPLES.md#clear-stored-credentials): Delete the user's credentials to complete the logout process.
* [Retrieve user information](https://github.com/auth0/Auth0.swift/blob/master/EXAMPLES.md#retrieve-user-information): Get the latest user information from the `/userinfo` endpoint.
Check the [FAQ](https://github.com/auth0/Auth0.swift/blob/master/FAQ.md) for more information about the alert box that pops up by default when using Web Auth.
See also [How to Create a Seamless Mobile SSO (Single Sign-On) Experience in iOS](https://developer.okta.com/blog/2022/01/13/mobile-sso) for a detailed overview.
## Next steps
Learn about most features in [Examples](https://github.com/auth0/Auth0.swift/blob/master/EXAMPLES.md):
* [Store credentials](https://github.com/auth0/Auth0.swift/blob/master/EXAMPLES.md#store-credentials): Store the user's credentials securely in the Keychain.
* [Check for stored credentials](https://github.com/auth0/Auth0.swift/blob/master/EXAMPLES.md#check-for-stored-credentials): Check if the user is already logged in when your app starts up.
* [Retrieve stored credentials](https://github.com/auth0/Auth0.swift/blob/master/EXAMPLES.md#retrieve-stored-credentials): Get the user's credentials from the Keychain, automatically renewing them if they have expired.
* [Clear stored credentials](https://github.com/auth0/Auth0.swift/blob/master/EXAMPLES.md#clear-stored-credentials): Delete the user's credentials to complete the logout process.
* [Retrieve user information](https://github.com/auth0/Auth0.swift/blob/master/EXAMPLES.md#retrieve-user-information): Get the latest user information from the `/userinfo` endpoint.