> ## Documentation Index
> Fetch the complete documentation index at: https://docs-dev-docs-event-stream-action-templates.mintlify.site/llms.txt
> Use this file to discover all available pages before exploring further.
# 多要素認証を有効にする
> Auth0 Dashboardで多要素認証(MFA)を有効にする方法を説明します。
Auth0 Dashboardでは、テナントに対して多要素認証(MFA)を有効にすることができます。
MFAを有効にするときは、ユーザーに使用してもらう要素(プッシュ通知や電話メッセージなど)を選択し、いつ認証を求めるかを定めたポリシーを作成します。
## 要素を選択する
Auth0では、認証の際にユーザーに使用してもらえるよう、さまざまな要素をサポートしています。
### 独立した要素
テナントのユーザーにMFAを要求するには、独立した要素を少なくとも1つ有効にし、構成しなければなりません。同時に複数の独立した要素を有効にすることもできます。
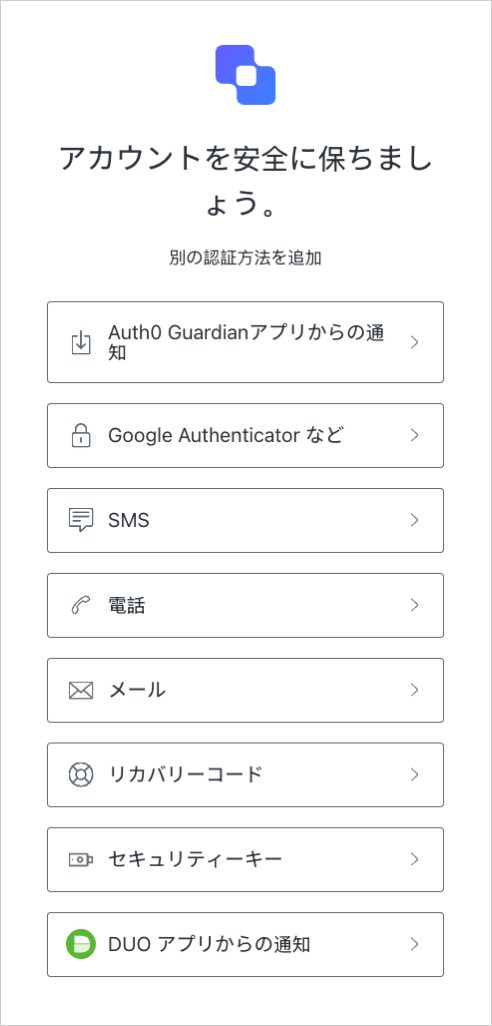
次のような要素を独立した要素として使用できます。
* [WebAuthnとFIDOセキュリティキー](/docs/ja-jp/secure/multi-factor-authentication/fido-authentication-with-webauthn/configure-webauthn-security-keys-for-mfa)
* [ワンタイムパスワード(OTP)](/docs/ja-jp/secure/multi-factor-authentication/multi-factor-authentication-factors/configure-otp-notifications-for-mfa)
* [Auth0 Guardianを使ったプッシュ通知](/docs/ja-jp/secure/multi-factor-authentication/multi-factor-authentication-factors/configure-push-notifications-for-mfa)
* [電話メッセージ](/docs/ja-jp/secure/multi-factor-authentication/multi-factor-authentication-factors/configure-sms-voice-notifications-mfa)
* [Cisco Duo Security](/docs/ja-jp/secure/multi-factor-authentication/configure-cisco-duo-for-mfa)
### 依存性要素
テナントのユーザーに対して独立した要素を少なくとも1つ有効にし、構成したら、依存性の要素を有効にできます。
次のような要素を依存性要素として使用できます。
* [WebAuthnとFIDO生体認証](/docs/ja-jp/secure/multi-factor-authentication/fido-authentication-with-webauthn/configure-webauthn-device-biometrics-for-mfa)
* [メールアドレス](/docs/ja-jp/secure/multi-factor-authentication/multi-factor-authentication-factors/configure-email-notifications-for-mfa)
* [復旧コード](/docs/ja-jp/secure/multi-factor-authentication/configure-recovery-codes-for-mfa)
## Auth0 DashboardでMFAを有効にする
1. [[Dashboard]>[Security(セキュリティ)]>[Multi-factor Auth(多要素認証)]](https://manage.auth0.com/#/security/mfa)に移動します。
2. **[Factors(要素)]** セクションで、ユーザーが利用できるようにしたい要素を有効化して構成します。
3. **[Define policies(ポリシーの定義)]** セクションで、ユーザーにMFAを求めるタイミングを決定するポリシーを選択します。
* **[Never(求めない)]** :ログイン時にMFAは必要ありません。
* **[Use Adaptive MFA(Adaptive MFAを使用する)]** :Auth0のリスク決定に基づいてMFAが必要になります。詳しくは、「[Adaptive MFAを有効化する](/docs/ja-jp/secure/multi-factor-authentication/adaptive-mfa)」をお読みください。
* **[Always(常に)]** :ログイン時には常にMFAが必要です。
4. **[Never(求めない)]** または **[Always(常に)]** ポリシーを選択した場合は、**[MFA Risk Assessors(MFAリスクアセッサー)]** セクションが表示されます。デフォルトでは、**[Enable Adaptive MFA Risk Assessment(Adaptive MFAリスク評価を有効にする)]** が無効になっています。有効にすると、テナントのログにあるログイントランザクションに対して、リスクが評価・記録されます。
5. **[Additional Settings(追加設定)]** セクションで、必要に応じて以下のオプションを設定します。
* **Show Multi-factor Authentication options(多要素認証オプションを表示する):** このトグルを有効にすると、ユーザーは登録時に認証要素を選択できるようになります。無効にすると、ユーザーの登録時にAuth0が自動的に最も安全な認証要素を提示します。
 * **Customize MFA Factors using Actions(アクションを使用してMFA要素をカスタマイズする)** :`post-login`[アクション](/docs/ja-jp/customize/actions)を使用してMFAフローをカスタマイズするには、このトグルを有効にします。ユーザーに特定の要素や要素の組み合わせを要求したり、コンテキスト情報を用いて個々人に合ったエクスペリエンスを提供したりできます。詳しくは、「[ユニバーサルログインのMFA選択をカスタマイズする](/docs/ja-jp/secure/multi-factor-authentication/customize-mfa/customize-mfa-selection-universal-login)」をご確認ください。
6. **[Save(保存)]** をクリックします。
## MFAフローをカスタマイズする
Auth0 Actionsを使用すると、テナントのユーザーのためにMFAフローをカスタマイズすることができます。たとえば、特定の状況でMFAを要求するActionや、特定の要素の使用を強制するActionを作成できます。
詳しくは、「[Adaptive MFAをカスタマイズする](https://auth0.com/docs/secure/multi-factor-authentication/adaptive-mfa/adaptive-mfa-rules)」をご確認ください。
## もっと詳しく
* [MFA用プッシュ通知を構成する](/docs/ja-jp/secure/multi-factor-authentication/multi-factor-authentication-factors/configure-push-notifications-for-mfa)
* [MFA用OTP通知を構成する](/docs/ja-jp/secure/multi-factor-authentication/multi-factor-authentication-factors/configure-otp-notifications-for-mfa)
* [MFAにSMSと音声通知を設定する](/docs/ja-jp/secure/multi-factor-authentication/multi-factor-authentication-factors/configure-sms-voice-notifications-mfa)
* [MFA用メール通知を構成する](/docs/ja-jp/secure/multi-factor-authentication/multi-factor-authentication-factors/configure-email-notifications-for-mfa)
* [MFAにCisco Duo Securityを構成する](/docs/ja-jp/secure/multi-factor-authentication/configure-cisco-duo-for-mfa)
* [多要素認証ページをカスタマイズする](/docs/ja-jp/secure/multi-factor-authentication/customize-mfa)
* **Customize MFA Factors using Actions(アクションを使用してMFA要素をカスタマイズする)** :`post-login`[アクション](/docs/ja-jp/customize/actions)を使用してMFAフローをカスタマイズするには、このトグルを有効にします。ユーザーに特定の要素や要素の組み合わせを要求したり、コンテキスト情報を用いて個々人に合ったエクスペリエンスを提供したりできます。詳しくは、「[ユニバーサルログインのMFA選択をカスタマイズする](/docs/ja-jp/secure/multi-factor-authentication/customize-mfa/customize-mfa-selection-universal-login)」をご確認ください。
6. **[Save(保存)]** をクリックします。
## MFAフローをカスタマイズする
Auth0 Actionsを使用すると、テナントのユーザーのためにMFAフローをカスタマイズすることができます。たとえば、特定の状況でMFAを要求するActionや、特定の要素の使用を強制するActionを作成できます。
詳しくは、「[Adaptive MFAをカスタマイズする](https://auth0.com/docs/secure/multi-factor-authentication/adaptive-mfa/adaptive-mfa-rules)」をご確認ください。
## もっと詳しく
* [MFA用プッシュ通知を構成する](/docs/ja-jp/secure/multi-factor-authentication/multi-factor-authentication-factors/configure-push-notifications-for-mfa)
* [MFA用OTP通知を構成する](/docs/ja-jp/secure/multi-factor-authentication/multi-factor-authentication-factors/configure-otp-notifications-for-mfa)
* [MFAにSMSと音声通知を設定する](/docs/ja-jp/secure/multi-factor-authentication/multi-factor-authentication-factors/configure-sms-voice-notifications-mfa)
* [MFA用メール通知を構成する](/docs/ja-jp/secure/multi-factor-authentication/multi-factor-authentication-factors/configure-email-notifications-for-mfa)
* [MFAにCisco Duo Securityを構成する](/docs/ja-jp/secure/multi-factor-authentication/configure-cisco-duo-for-mfa)
* [多要素認証ページをカスタマイズする](/docs/ja-jp/secure/multi-factor-authentication/customize-mfa)